These patterns are free to make as many projects as you like from them for your personal use or for charity donations.
If you wish to sell finished items you have personally made from any of the patterns for example at a craft fair stall or in your own online store, please include a reference to the pattern source for people who might want to make their own!
These patterns are not to be used to mass produce items for commercial sale.
These patterns are a work in progress, and I plan to add photos of major steps and new patterns in the future!
Tiny Turnip
Materials
- White DK yarn
- Green DK yarn
- Black yarn, DK or thinner
- Stuffing e.g. polyfil
Equipment
- 2.5mm double pointed needles (DPNs)
- 2mm crochet hook
- Yarn needle

Pattern
Using white DK yarn, cast on 6 stitches, distribute between three DPNs and join in the round being careful not to twist (6 stitches split 2-2-2)
- kfb round (12 stitches split 4-4-4)
- *k2, kfb* three times (15 stitches split 5-5-5)
- k round
- k round
Leave stitches on needles while working the leaves as follows;
- Cut one 40cm length of green wool, and one 20cm length
- Tie the shorter one to the center point of the longer length, making three strands of green from a central point
- Thread each thread end through from the inside (wrong side) of the work to the outside (right side) of the part worked so far, all as close to the middle as possible
Return to working the body;
- *dec, k1, dec* three times (9 stitches split 3-3-3)
Add stuffing now - it can help to roll the stuffing into a small ball first
- *dec, k1* three times (6 stitches split 2-2-2)
- dec in every stitch round (3 stitches split 1-1-1)
Cut wool leaving some tail, use needle to thread tail through all 3 stitches in round pulling tight to make the pointed end of the turnip. Finish off with the leavse as follows;
- Make a slip knot about 0.5 to 1cm away from where the green thread comes out of the turnips body, using the crochet hook if it helps
- Yarn over and pull through to make one chain stitch, repeat this 4-8 times depending on how long you want the leaf
- Pull the tail through the final stitch and weave it along the leaf before cutting close to the surface
- Repeat on the other two leaves
Use black yarn to embroider a face on your turnip, and you are done!
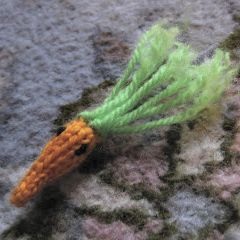
Tiny Carrot
Materials
- Orange DK yarn
- Green DK yarn
- Black yarn, DK or thinner (if embroidering eyes)
- Stuffing e.g. polyfil
Equipment
- 2.5mm double pointed needles (DPNs)
- Small (2-3mm) crochet hook
- Yarn needle

Pattern
Using orange DK yarn, cast on 3 stitches on one DPN
Work i-cord over 3 stitches for the first two rows
- k, kfb, k (4)
- i-cord the 4 stitches
- k2, kfb, k (5)
- i-cord the 5 stitches
- i-cord the 5 stitches
- k2, kfb, k2 (6)
Split the stitches onto DPNs, 6 stitches split 2-2-2
- knit around
- k2, kfb, k3 (7 stitches split 2-3-2)
Add stuffing - it can help to roll the stuffing into a stick shape first
Cut the yarn leaving enough tail to thread through all 7 stitches and pull tight, then work the leaves as follows;
- Cut 3 lengths of green DK wool about 10cm long each for the leaves
- Insert the crochet hook under a stitch at the very top of the carrot and pull the center of one green strand through, then pull the ends through the loop to attach them
- Repeat with the other two strands, so you have six strands coming out the top of the carrot
- Holding all the leaf strands between thumb and forefinger at the base (nearest the carrot), comb through the ends of the green yarn to separate them out into springy carrot leaves.
If you will be adding eyes or a face, add them now with the black yarn, and you are done!